Instalar Servidor de Mumble en Debian
Que es Mumble ?
![]() Mumble es una aplicación multiplataforma libre de voz sobre IP especializada en la multiconferencia. Sus principales usuarios son jugadores, y es similar a programas privativos como TeamSpeak y Ventrilo. Usa una arquitectura cliente-servidor donde los usuarios que quieren hablar se conectan al mismo servidor.
Mumble es una aplicación multiplataforma libre de voz sobre IP especializada en la multiconferencia. Sus principales usuarios son jugadores, y es similar a programas privativos como TeamSpeak y Ventrilo. Usa una arquitectura cliente-servidor donde los usuarios que quieren hablar se conectan al mismo servidor.
La meta del diseño de mumble no es tanto crear la utilidad para juegos más elitista sino hacerla la más social. La meta es recrear la sensación y la interacción de una LAN party. Por eso Mumble tiene una interfaz de configuración muy simple y el mayor esfuerzo de ingeniería está en su gran calidad de sonido y su baja latencia.
Requerimientos:
- 512 MB de memoria RAM
- Debian 7 en adelante
Ingresar al equipo como administrador o root
# su
Es conveniente siempre realizar un update y upgrade
# apt-get update
# apt-get upgrade
Luego procedemos a instalar el server mumble del repositorio:
# apt-get install mumble-serverEsperamos que la aplicación se instale y luego debemos configurarlo con el siguiente comando:
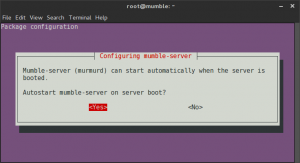
# dpkg-reconfigure mumble-serverIndicamos que arranque el servicio al encender nuestro server
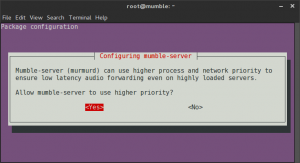
Indicamos la prioridad de la red, es decir que mumble sea el servicio que mayor prioridad tenga en el server al ejecutarse asignando anchos de banda y espacio de memoria:
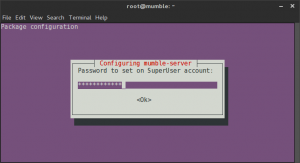
Finalmente colocamos la clave de nuestro servidor para asegurarlo, si se deja en blanco quedara sin protección:
Si en un momento dado necesitamos cambiar alguna configuración podemos editar el siguiente archivo:
# nano /etc/mumble-server.iniDonde tendremos los siguientes parámetros:
- autobanAttempts, autobanTimeframe, autobanTime – These three values are used to prevent bruteforcing attempts, and will ban the IP for the specified amount of time after the other two conditions are met.
- welcometext – This is the welcome message every user receives when connecting to the server. It is useful for informing users of rules, linking to your website, etc. You can use most HTML characters and tags; just make sure the entire entry is encapsulated in quotes.
- port – The default Mumble port is 64738. You can change this value, but make sure to inform your users to enter the correct port when connecting to the server manually.
- host – By default Mumble will bind to any host name automatically. If you want it to use a single host name, you enter that host name here.
- bandwidth – This is the amount of bandwidth each user is allowed to consume. Keep in mind that if you set a higher value, each user will consume more RAM. Values between 60000-72000 are good for hosting 50 users on 512 MB of RAM.
- users – The maximum number of simultaneous users that can connect to the server. For 512 MB of RAM, the recommended setting is 50 users for 60Kbps-72Kbps bandwidth per user.
- textmessagelength – Not enabled by default; will limit the number of characters a user can send per message.
- imagemessagelength – Not enabled by default; will set the maximum file size for images a user is allowed to send.
- allowhtml – Not enabled by default; allows HTML in messages, comments, and channel descriptions.
- registerName, RegisterUrl – If enabled, this will allow your server to be found on the public list available in the Mumble Client. Otherwise the user will need to know the host name or IP address of the server to be able to connect.
Por ultimo para reiniciar el servidor lo podemos hacer con el siguiente comando:
# service mumble-server restartConfiguración del Cliente Mumble
En primer lugar debemos bajar el cliente de mumble, ya sea para PC o Móvil de este enlace Mumble client., lo instalamos y ejecutamos la aplicación.
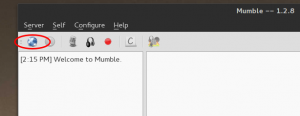
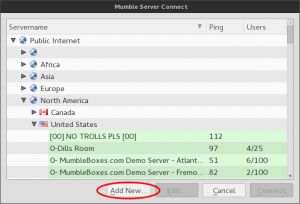
Y hacemos click en el botón de conexión para agregar nuestro server
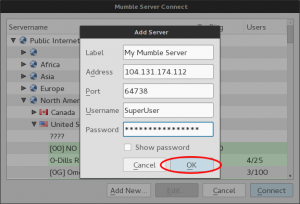
Entonces agregamos los datos indicando la IP en donde instalamos nuestro server así como el puerto definido para esa comunicación:
Finalmente para conectarnos solo debemos escoger la conexión creada y listo! podremos comunicarnos en salas de comunicación por voz.
Espero que este corto manual sea de su utilidad.
NOTA: Para instalar en Android la aplicación de VoIP como cliente del Mumble; buscar la aplicación: Mumla